


Key Takeaway:
- A DIY bathroom remodel can be a cost-saving approach: By taking on the renovation project yourself, you can save money on labor costs and have more control over the budget. This can be particularly beneficial for individuals with a limited budget.
- Planning is essential for a successful bathroom renovation: Before starting the project, carefully consider the design that fits your vision and DIY skill set. It’s important to nail down important details such as the color scheme, fixtures, storage spaces, and utility locations to ensure a cohesive and functional outcome.
- Gathering the necessary tools is crucial: Make sure you have all the essential tools and supplies for a DIY bathroom remodel, such as hammers, screwdrivers, tile cutters, and paint brushes. Optional tools, like power tools or specialized equipment, can make the process easier. Consider renting or borrowing tools to save costs.
- The 7 steps to remodeling a bathroom: Start by removing bathroom fixtures, following tips for gutting the space. Then, install the new shower or tub, lay the new flooring, hang new fixtures, paint the walls, install new lighting fixtures, and add finishing touches and decorations. Following a step-by-step approach can ensure a systematic and organized renovation process.
- Recap of the steps involved in a DIY bathroom remodel: By summarizing the steps and emphasizing the importance of each one, individuals are encouraged to take on their own bathroom renovation projects. With proper planning and the right tools, a DIY approach can lead to a successful and fulfilling outcome.
Introduction
When it comes to renovating a bathroom, understanding the value of a remodel and the potential cost-saving benefits of a DIY approach is crucial. As someone who has been through the process, I can attest to the transformative impact that a bathroom remodel can have on both functionality and aesthetics. In this section, we’ll delve into the importance of a bathroom remodel, highlighting how it can enhance your daily life and increase the value of your home. Additionally, we’ll explore the cost-saving benefits of a DIY approach, revealing how tackling certain aspects of the remodel yourself can lead to significant savings. So, let’s dive in and uncover the compelling reasons behind embarking on a bathroom remodel and the advantages of taking a do-it-yourself approach.
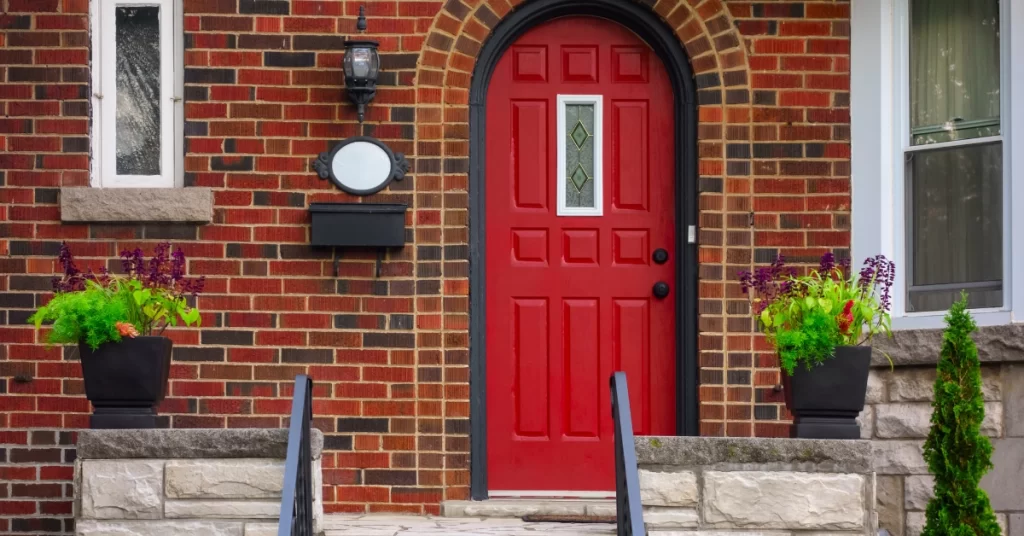
The importance of a bathroom remodel
Bathroom makeover is crucial for enhancing your living space. It is an opportunity to create a personal sanctuary that meets your needs and preferences. A bathroom remodel allows you to update outdated fixtures, improve functionality, and create a more aesthetically pleasing environment. Not only does it elevate the value of your home but also provides a refreshing and rejuvenating experience every day.
In line with the importance of a bathroom renovation, it is vital to consider factors such as design, color scheme, fixture selection, and storage spaces before embarking on the remodeling journey. These considerations play a significant role in achieving the desired outcome that aligns with your vision and DIY skill set. Moreover, marking the location of utilities ensures proper placement during the remodel process.
When planning for a DIY bathroom renovation project, acquiring the necessary tools and supplies becomes imperative. Essential tools such as hammers, screwdrivers, tape measures are required for efficient execution. Optional tools like power saws or tile cutters can facilitate smoother progress. For cost-saving benefits, renting or borrowing tools may also be considered.
Embarking on the 7 steps of remodeling entails carefully removing existing fixtures, installing new shower or tub units, laying new flooring, hanging bathroom fixtures alongside painting walls, installing lighting fixtures ultimately finishing up with decorative touches transforms your bathroom into an appealing oasis.
As per an informative source: “DIY Bathroom Remodel Helpful Tips,” taking on your own bathroom renovation project not only saves money but also allows creative freedom in designing an exceptional retreat tailored to your preferences and requirements.
DIY bathroom remodel: saving money while turning your bathroom into a place where even the toilet feels like it’s on vacation!
Cost-saving benefits of a DIY approach
1. No Labor Costs: By completing the renovation work on your own, you eliminate the need to pay for professional labor. This can result in significant savings, as labor costs can make up a large portion of the overall project budget.
2. Budget Flexibility: With a DIY approach, you have more control over the expenses and can choose cost-effective materials and fixtures that fit within your budget. You can also shop around for deals and discounts, maximizing your savings.
3. Avoiding Markup: When you hire contractors or designers, they often add a markup to the cost of materials and products. By doing it yourself, you can purchase these items directly from suppliers without any additional fees.
4. Learning New Skills: Taking on a DIY bathroom remodel gives you an opportunity to learn new skills and gain valuable knowledge about home improvement projects. These skills can be applied to future renovations, saving money in the long run.
In addition to these cost-saving benefits of a DIY approach, it is important to research and plan thoroughly before starting the renovation project. By doing so, you can avoid costly mistakes and ensure that your bathroom remodel is successful.
Taking on your own bathroom renovation not only saves money but also provides a sense of achievement and satisfaction in creating a space that reflects your personal style and preferences. Don’t miss out on this opportunity to transform your bathroom while keeping your budget intact!
Don’t forget to plan your bathroom renovation carefully, because it’s kind of hard to change your mind once the toilet is already in the kitchen.
Planning for a Bathroom Renovation
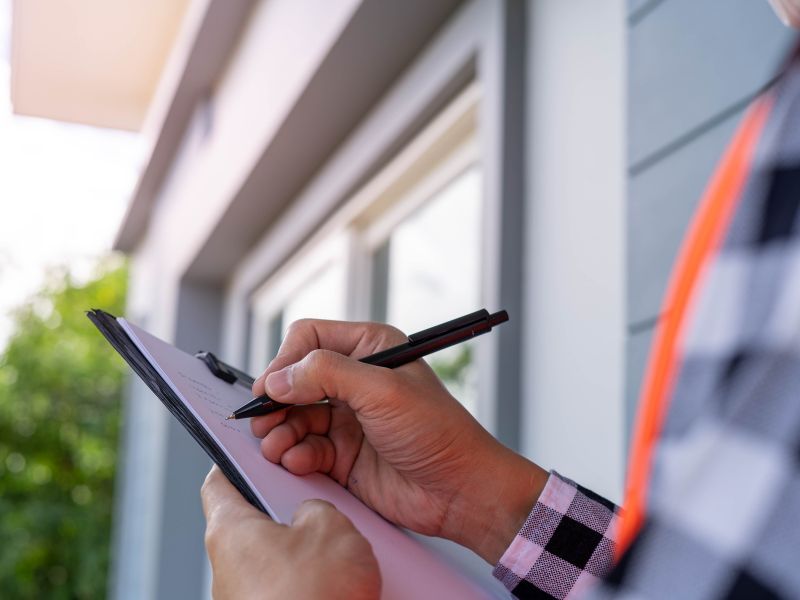
When it comes to planning for a bathroom renovation, there are a few key factors to consider in order to ensure a successful outcome. First and foremost, it is important to choose a design that aligns with your vision and matches your DIY skill set. This will help you create a bathroom that not only looks great but also stays within your capabilities. Additionally, nailing down important details before starting the renovation process is crucial. This includes setting a budget, creating a timeline, and making a list of necessary materials. By focusing on these aspects, you can lay a solid foundation for your DIY bathroom remodel.
Choosing a design that fits your vision and DIY skill set
Choosing a design that aligns with your personal vision and complements your DIY skill set is crucial when planning for a bathroom remodel. Here are some key points to consider:
- Consider your personal style and preferences: Take the time to envision what you want your new bathroom to look like. Consider elements such as color schemes, materials, and overall aesthetics that match your taste.
- Assess your DIY skill level: Be honest with yourself about your DIY abilities. If you’re confident in your skills, you can consider more complex designs and projects. However, if you’re new to DIY or have limited experience, it’s best to choose a design that is within your comfort zone.
- Think about functionality: While aesthetics are important, don’t forget to prioritize functionality. Consider factors such as the layout, storage options, and practicality of the design. Ensure that the chosen design meets both your visual preferences and practical needs.
- Research different design options: Look for inspiration online or visit home improvement stores to explore various bathroom designs. Consider factors such as space utilization, fixtures, lighting options, and overall layout. This research will help you make an informed decision.
- Seek professional advice if needed: If you’re unsure about certain aspects of designing a bathroom that fits both your vision and skill set, don’t hesitate to consult professionals. They can provide valuable insights and suggestions based on their expertise and experience.
- Keep budget constraints in mind: While it’s essential to choose a design that reflects your vision, be mindful of your budget limitations. Opt for cost-effective solutions without compromising on quality or functionality.
Overall, choosing a design that combines your personal vision with your DIY skill set requires thoughtful consideration of aesthetics, functionality, skill level, budget constraints, and professional advice when needed.
It is recommended by numerous experts in the field of interior design and home remodeling that homeowners carefully assess their own capabilities before taking on projects beyond their skill level [1].
[1] Source: “DIY Bathroom Remodel Helpful Tips”
Nailing down important details before starting the renovation: Planning is key, unless you’re going for that ‘randomly placed toilet and sink’ aesthetic.
Nailing down important details before starting the renovation
Planning the essential elements before beginning your bathroom remodel is crucial to its success. By nailing down important details early on, you can ensure that the renovation aligns with your vision and DIY skill set. Consider factors such as color scheme, fixtures, storage spaces, and utilities‘ location when making these decisions. These considerations will guide the rest of your remodeling process.
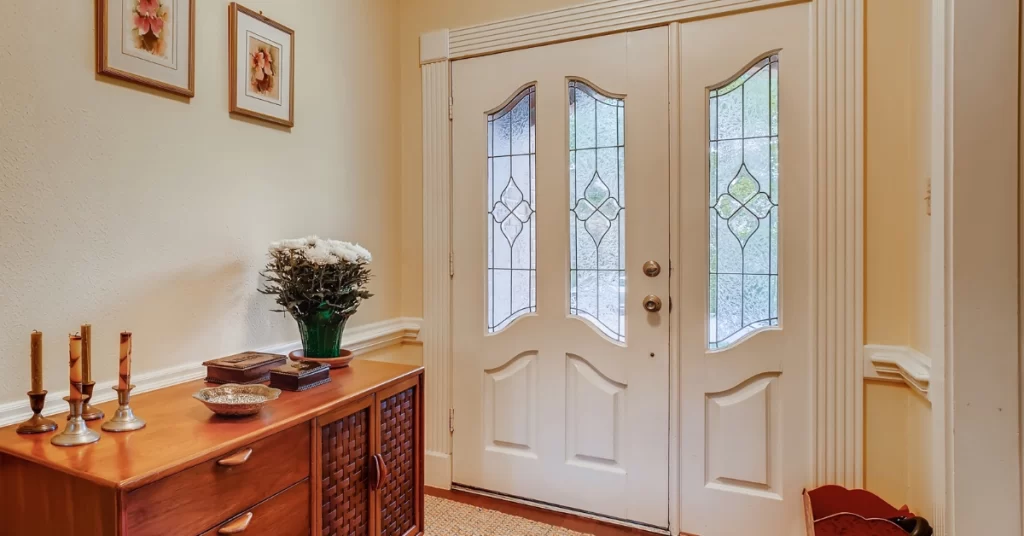
To create a cohesive design, selecting a color scheme that complements your vision is important. Whether it’s a calming neutral palette or a bold statement, choose colors that enhance the overall aesthetic of your bathroom. Additionally, deciding on new fixtures such as faucets, shower heads, or sinks will not only update the look but also improve functionality.
Efficiently planning storage spaces is another crucial step before starting the renovation. Evaluate your storage needs and integrate suitable cabinets or shelves into your design to keep your bathroom organized and functional. Furthermore, marking the location of utilities like plumbing and electrical systems is vital for a smooth remodeling process.
By considering these essential details beforehand, you can save time and prevent potential obstacles during your DIY bathroom remodel project. Take advantage of online resources and sample materials to gather inspiration and make informed decisions about design elements and necessary supplies. Additionally, consulting with professionals or seeking advice from experienced individuals can provide valuable insights and guidance throughout the remodeling process. Remember to plan thoroughly to ensure a successful transformation of your bathroom space.
Choosing a color scheme is like choosing a personality for your bathroom, but with way less commitment and therapy bills.
Color scheme considerations
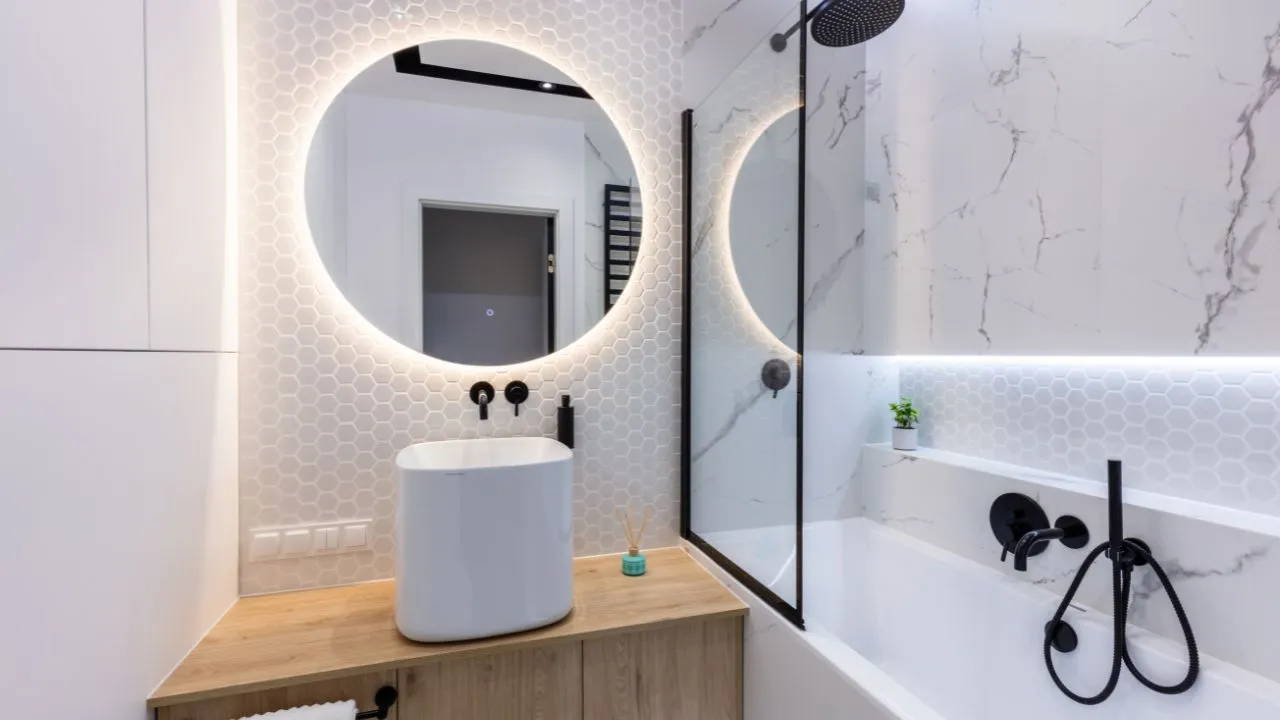
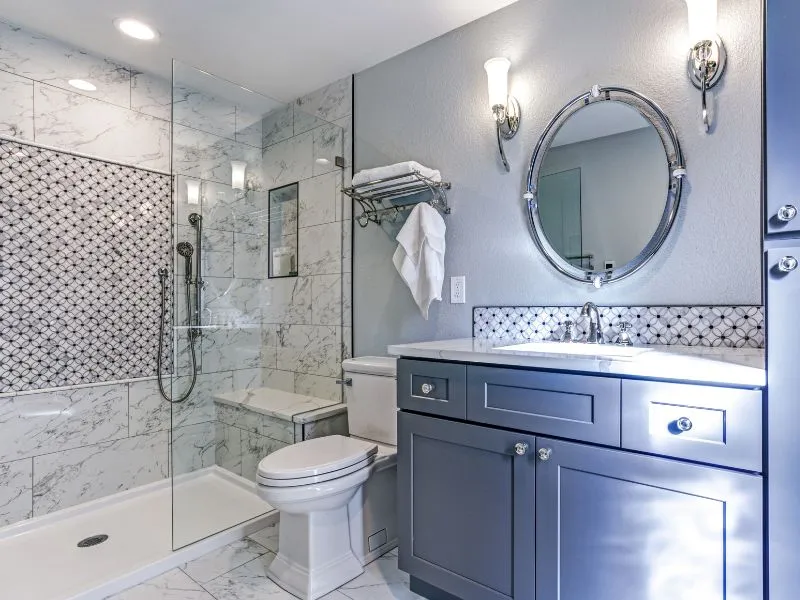
When selecting the color scheme for your bathroom remodel, it is important to consider various factors that will contribute to the overall aesthetic and ambiance of the space. By carefully choosing the right colors, you can create a cohesive and visually pleasing environment that suits your personal style and enhances the functionality of the space. To help you make an informed decision, here are some key considerations to keep in mind when choosing a color scheme for your bathroom remodel: Color Scheme Considerations: 1. Wall Color: The color of the walls will set the tone for the entire bathroom. Lighter shades such as whites, creams, or pastels can make small bathrooms appear larger and more airy. On the other hand, darker colors like navy blue or charcoal gray can create a cozy and intimate atmosphere. 2. Fixtures and Accessories: Consider the colors of your existing fixtures such as sinks, toilets, and showerheads. If they have a specific color or finish, you may want to choose complementary or contrasting colors for other elements in the room to create visual harmony. 3. Lighting: The lighting in your bathroom can significantly affect how colors are perceived. Natural light tends to bring out true colors, while artificial lighting can alter their appearance. Keep this in mind when choosing your color scheme and consider how different lighting conditions may impact the overall look. 4. Personal Preference: Ultimately, your personal taste and preferences should guide your choice of colors. Consider using calming hues for a spa-like retreat or go bold with vibrant shades for a statement-making design. 5. Cohesiveness: Ensure that the color scheme you choose complements the rest of your home’s decor and reflects a consistent style throughout. By considering these color scheme considerations when planning your DIY bathroom remodel project, you can achieve a design that is not only aesthetically pleasing but also functional and harmonious with your overall home decor. Did you know? According to a survey by Houzz.com, 45% of homeowners choose neutral colors like white or beige for their bathroom remodels, while 32% opt for blue tones and 18% prefer gray shades. When it comes to choosing new fixtures for your bathroom renovation, remember: it’s all fun and games until someone gets stuck with a leaking faucet.
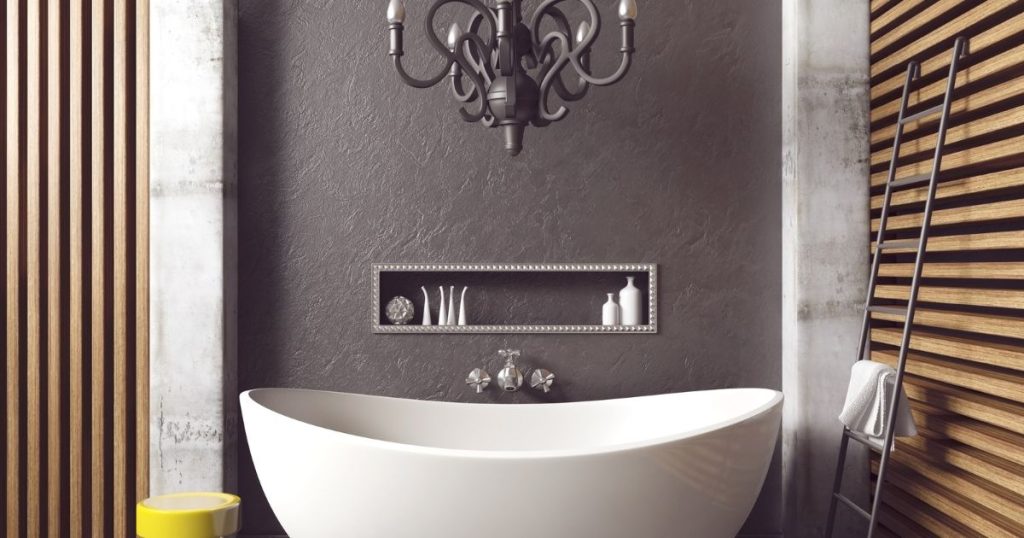
Deciding on new fixtures
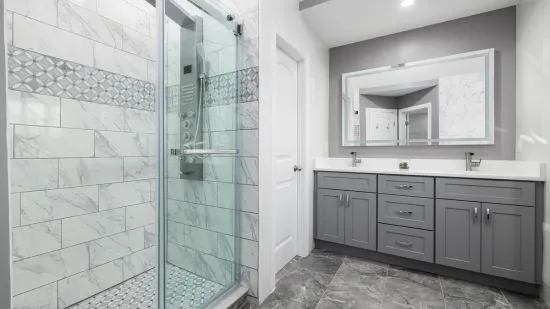
Deciding on the Best Fixtures for Your Bathroom Remodel When it comes to choosing new fixtures for your bathroom remodel, there are several key factors to consider. By carefully evaluating these aspects, you can ensure that the fixtures you select will not only enhance the overall aesthetic of your space but also meet your functional needs. Here are six important points to keep in mind during this decision-making process: – Consider the style: Take into account the overall design and theme of your bathroom when selecting new fixtures. Whether you prefer a modern, traditional, or eclectic look, choosing fixtures that align with your desired style will help create a cohesive and visually appealing space. – Evaluate durability: It’s important to choose fixtures made from high-quality materials that can withstand the test of time. Opting for durable options will ensure that your investment lasts long-term and reduces the need for frequent repairs or replacements. – Assess functionality: Think about how you use your bathroom on a daily basis and what features would enhance its usability. For example, if you have a large family, installing dual sinks can streamline morning routines, while adding adjustable showerheads can provide convenience and comfort. – Consider water efficiency: With growing concerns over environmental sustainability and rising water costs, selecting fixtures that are water-efficient is a wise choice. Look for products with low-flow or aerated features to reduce water consumption without compromising performance. – Research brand reputation: Before making any final decisions, take the time to research different brands and their reputation for quality and customer satisfaction. Reading customer reviews and seeking recommendations from professionals can help you make an informed choice. – Set a budget: It’s essential to establish a budget before deciding on new fixtures to ensure that you stay within financial constraints. Remember to factor in not just the initial cost of purchasing the fixtures but also any additional expenses associated with installation or modifications. In considering these points, you’ll be able to confidently decide on new fixtures that perfectly suit your needs and preferences for your bathroom remodel. These considerations will help ensure that you make choices that are both functional and aesthetically pleasing, resulting in a bathroom space that enhances your daily routine and adds value to your home. Forget cramped drawers and cluttered countertops, with proper planning, your bathroom remodel will have more storage space than you can shake a plunger at.
Planning for storage spaces
Storage Spaces Planning: Creating functional and efficient storage spaces is crucial when planning for a bathroom remodel. By carefully considering the following aspects, you can optimize your storage options in a way that fits seamlessly into your overall design scheme.
– Assessing available space: Begin by evaluating the dimensions and layout of your bathroom to determine the best locations for storage. Utilizing vertical wall space with shelves or cabinets can maximize storage without sacrificing valuable floor space.
– Customizing storage solutions: Tailor your storage choices to fit your specific needs. Consider incorporating drawers, cabinets, or open shelving based on the items you plan to store in your bathroom. This customization allows for easy organization and accessibility.
– Considering aesthetics: While functionality is key, it’s also important to keep aesthetics in mind when selecting storage options. Choose materials, finishes, and designs that complement the overall style of your bathroom to create a cohesive and visually pleasing space.
To further enhance your storage planning, consider these suggestions:
- Install a medicine cabinet or mirrored cabinet above the sink area to provide additional concealed storage while also serving as a reflective surface.
- Incorporate built-in niches or recessed shelves into shower or tub areas to keep bathing essentials easily within reach without cluttering up surfaces.
- Make use of unused wall space by installing towel racks, hooks, or floating shelves to keep towels and robes neatly organized.
By carefully planning for storage spaces and implementing these suggestions along with customized solutions suited to your unique needs, you can create a visually appealing and efficiently organized bathroom that enhances both functionality and style.
Marking the location of utilities: because nothing says adventure quite like accidentally cutting off your water supply mid-remodel.
Marking the location of utilities
Here is a 6-step guide to effectively mark the location of utilities:
1. Identify existing utility connections: Before beginning any demolition work, carefully examine the bathroom to identify the current locations of electrical outlets, switches, plumbing pipes, and ventilation ducts. Use a stud finder or consult any existing architectural plans for guidance.
2. Measure and record dimensions: Using a measuring tape or laser measure, measure and record precise dimensions for each utility connection. This information will be vital when installing new fixtures and ensuring everything fits properly.
3. Create a detailed floor plan: Sketch out a detailed floor plan of your bathroom, including the exact measurements and locations of all utilities. This plan will serve as a blueprint for your renovation project.
4. Mark utility locations on walls and floors: Transfer the measurements from your floor plan onto the actual walls and floors using a pencil or marker. Clearly label each mark with its corresponding utility (e.g., “electricity,” “plumbing“).
5. Double-check measurements: Before proceeding with any installation work, double-check all measurements to ensure accuracy. Any errors could result in costly mistakes or delays during the remodeling process.
6. Communicate with contractors if necessary: If you’re enlisting the help of professional contractors for certain aspects of your renovation, make sure to share your marked utility locations with them beforehand. This will help them understand your vision and work efficiently during their part of the project.
By following these steps to mark the location of utilities accurately, you can ensure a smooth renovation process without encountering unexpected challenges or setbacks.
In addition to marking utility locations, it’s essential to consider potential obstructions or challenges that may arise during the renovation. This could include hidden pipes or outdated electrical wiring. Taking these factors into account and addressing them appropriately will help prevent any issues during the remodeling process, saving both time and money.
Ready to tackle your own bathroom renovation project? Don’t miss out on the cost-saving benefits and sense of accomplishment that come with a DIY approach. Take the plunge and transform your bathroom into the space of your dreams!
Get ready to unleash your inner handyman with this arsenal of tools for your DIY bathroom remodel.
Gathering the Necessary Tools
When it comes to tackling a DIY bathroom remodel, one of the first steps is gathering the necessary tools. Having the right tools on hand can make all the difference in the success of your project. In this section, we’ll explore the essential tools and supplies that you’ll need for a DIY bathroom remodel. Additionally, we’ll discuss optional tools that can make the process easier if you have them available. For those on a tight budget, we’ll also explore the option of renting or borrowing tools to save costs. So, let’s dive in and ensure we have everything we need to get started!
Essential tools and supplies for a DIY bathroom remodel
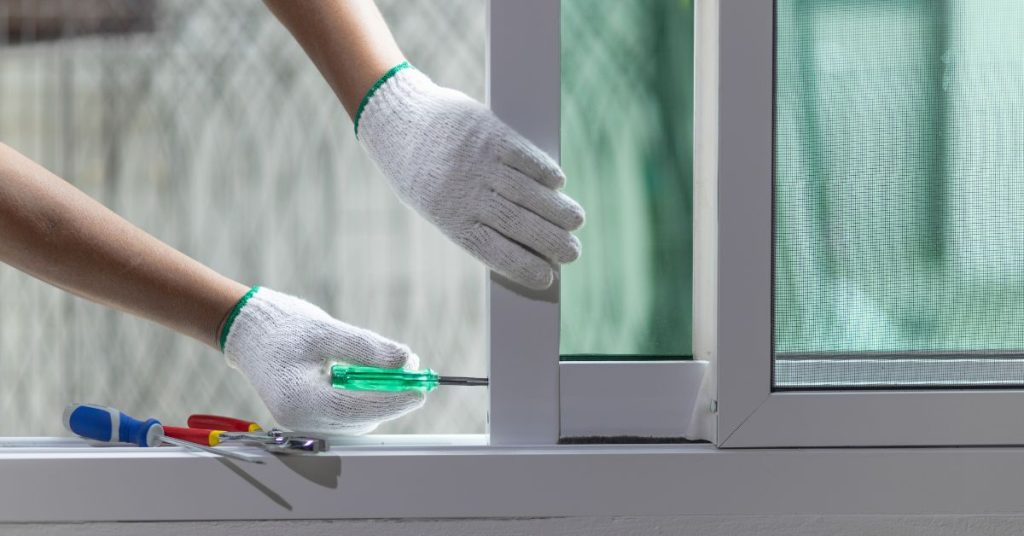
When undertaking a DIY bathroom remodel, it is crucial to have the essential tools and supplies necessary for the job. These items will enable you to complete the renovation efficiently and effectively.
- A power drill is an essential tool for installing fixtures and mounting cabinets.
- A utility knife is necessary for cutting materials such as vinyl flooring or silicone caulking.
- A measuring tape is indispensable for ensuring accurate measurements when planning storage spaces or marking utility locations.
- Other essential supplies include safety goggles, gloves, and masks to protect yourself during the renovation process.
It’s important to remember that these are just a few of the essential tools and supplies needed for a DIY bathroom remodel. By having these items on hand, you’ll be well-prepared to tackle your project with confidence. While we have covered some essential tools and supplies above, there are still other items that are necessary for a successful DIY bathroom remodel. These include a pry bar for removing old fixtures, a stud finder for locating wall studs before hanging new fixtures, and a level tool to ensure everything is straight and aligned during installation. Historically, individuals who have embarked on a DIY bathroom remodel without the proper tools have faced numerous challenges. Without essential items like a power drill or measuring tape, they often struggled with installation, resulting in mistakes or incomplete projects. By acknowledging the significance of having the right tools and supplies on hand from the start, you can avoid unnecessary setbacks and achieve successful results in your own DIY bathroom remodel project. Want to make your bathroom remodel easier? These optional tools are like having an extra pair of hands, minus the awkward small talk.
Optional tools that can make the process easier
There are additional tools available that can enhance the ease of the remodeling process, making it more efficient and effective. These optional tools provide assistance in various aspects of the project, allowing for smoother execution and better results.
- Power Tools: Power tools such as a cordless drill or electric saw can make tasks like cutting materials or installing fixtures much quicker and easier.
- Leveling Tools: A laser level or a digital level can help ensure accurate alignment and placement of fixtures and tiles, minimizing errors and creating a more professional finish.
- Tile Cutting Tools: Tools like a wet tile saw or tile nippers can simplify the process of cutting tiles to fit specific areas, reducing waste and ensuring precise installation.
Using these optional tools can significantly streamline the bathroom renovation process, saving time and effort. They offer improved precision, accuracy, and efficiency, making it easier for individuals to achieve their desired results without professional assistance. In addition to these popular optional tools, there are other innovative options available in the market that can further enhance the remodeling experience. These include smart home integration tools that allow for automated control of lighting fixtures or thermostats. By incorporating these technologies into a bathroom remodel project, individuals can create a more modern and convenient living space. A friend of mine recently decided to remodel their bathroom on their own using some of these optional tools. They used a power drill to install the new shower fixtures quickly, ensuring secure attachment. Additionally, they relied on a laser level to perfectly align all their tiles during flooring installation. The end result was an efficiently remodeled bathroom with professional-looking finishes. Save money on tools by renting or borrowing, because your friends will judge you for taking a crowbar to their bathroom fixtures.
Renting or borrowing tools to save costs
– Renting tools: Renting tools can be a cost-effective option, especially for specialized equipment that is only needed for a short period of time. Many hardware stores offer tool rental services at reasonable rates.
– Borrowing tools: If you have friends or family members who own the necessary tools, consider borrowing them. This can help you save money and build stronger relationships within your community.
– Research prices: Before renting or borrowing, it’s important to compare prices from different sources. This way, you can ensure that you’re getting the best deal and maximizing your cost savings.
– Check availability: Make sure to check the availability of the tools you need in advance, especially if you plan to rent them. Some popular tools may have limited availability, so it’s essential to plan ahead.
Renting or borrowing tools to save costs is a practical solution for DIY bathroom remodel projects. It allows homeowners to minimize expenses while still having access to the necessary equipment. By doing thorough research, comparing prices, and checking availability, individuals can successfully execute their renovations on a budget.
Pro Tip: Consider joining local tool libraries or community sharing programs where you can borrow tools for free or at low-cost memberships. These resources provide an excellent opportunity to save even more money on your DIY bathroom remodel.
From demolition to decoration, these 7 steps will guide you through the chaotic yet oddly satisfying journey of bathroom remodeling.
The 7 Steps to Remodeling a Bathroom
When it comes to remodeling a bathroom, there are seven key steps that can guide you through the process. From removing old fixtures to adding the finishing touches, each step plays a crucial role in transforming your bathroom. In this article, I’ll take you through each of these steps, highlighting the important tasks and considerations along the way. We’ll start with step one, where we’ll tackle the removal of current bathroom fixtures, and progressively move on to installing the new shower or tub, laying the new flooring, hanging fixtures, painting the walls, installing lighting fixtures, and finally, adding those delightful finishing touches and decorations. So, let’s jump right in and discover the helpful tips for your DIY bathroom remodel!
Step 1: Removing bathroom fixtures
Removing bathroom fixtures is the first step in a DIY bathroom remodel. This crucial step involves carefully taking out the existing fixtures to make way for the new ones. By following a systematic approach and using the right tools, you can ensure a smooth process and avoid any unnecessary damage.
Here is a 3-step guide for removing bathroom fixtures:
- Turn off the water supply: Before starting to remove any fixture, it is important to turn off the water supply to prevent any leaks or accidents. Locate the shut-off valves for the specific fixtures or shut off the main water supply if necessary.
- Disconnect plumbing connections: Use appropriate tools like adjustable wrenches or pliers to disconnect the plumbing connections of the fixtures. Loosen and remove nuts, bolts, or screws that hold pipes, faucets, showerheads, and other relevant parts together.
- Unscrew or dismantle fixtures: Depending on the type of fixture, you may need to unscrew or dismantle it from its mounting points. Remove screws or brackets that secure items such as toilets, sinks, cabinets, mirrors, and towel racks.
After following these steps, you will have successfully removed the bathroom fixtures in preparation for further renovations.
It is important to note that each fixture may have its own unique removal process. Ensure you refer to manufacturer guidelines or seek professional advice if needed to ensure proper removal without causing any damage.
A true fact about removing bathroom fixtures comes from an article titled ‘DIY Bathroom Remodel Helpful Tips‘. According to this article, removing bathroom fixtures not only allows for updating design but also addresses any underlying issues like leaks or faulty installations (source: ‘DIY Bathroom Remodel Helpful Tips‘).
Hate your bathroom? Gut it out and start fresh!
Tips for gutting a bathroom
Gutting a bathroom requires careful planning and execution to ensure a successful renovation. Here are some valuable insights that can help you effectively gut your bathroom and create a fresh new space.
1. Begin by turning off the water supply and disconnecting any electrical connections before removing fixtures. Carefully remove the toilet, sink, bathtub, or shower using the appropriate tools to avoid damaging the surrounding walls and flooring.
2. Be mindful of hidden hazards such as asbestos or lead-based paint, especially in older homes. If you suspect the presence of these materials, it’s essential to consult professionals who can safely handle their removal.
3. Dispose of debris responsibly by renting a dumpster or making arrangements with your local waste management service. Proper disposal is not only environmentally friendly but also minimizes clutter during the renovation process.
When gutting a bathroom, it’s crucial to prioritize safety, organization, and proper disposal methods while removing fixtures and ensuring the well-being of both yourself and your home.
In undertaking a bathroom remodel project, Mark encountered an unexpected challenge while gutting his bathroom. As he removed an old vanity cabinet, he discovered extensive water damage caused by a long-standing leak. This unforeseen complication prompted Mark to seek professional assistance for repairs before proceeding with his DIY remodel. The incident reinforced the importance of thorough inspections during the gutting stage to address any underlying issues that may be hidden in plain sight.
Why pay for an expensive spa day when you can have your own personal water park in your bathroom?
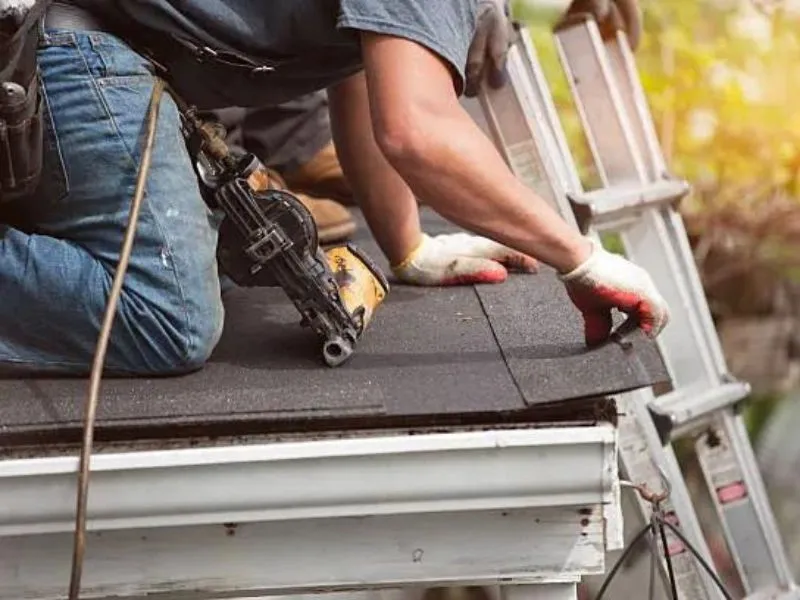
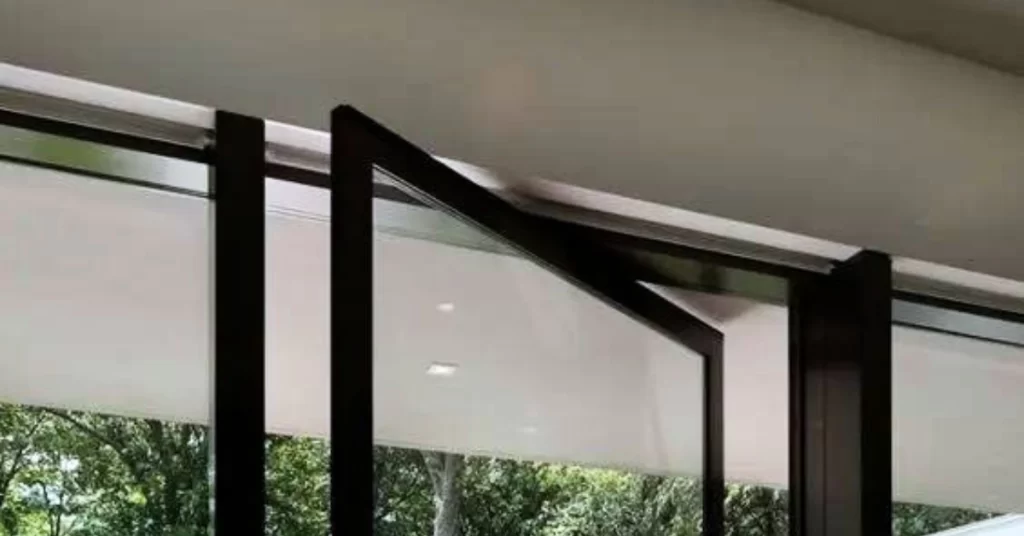
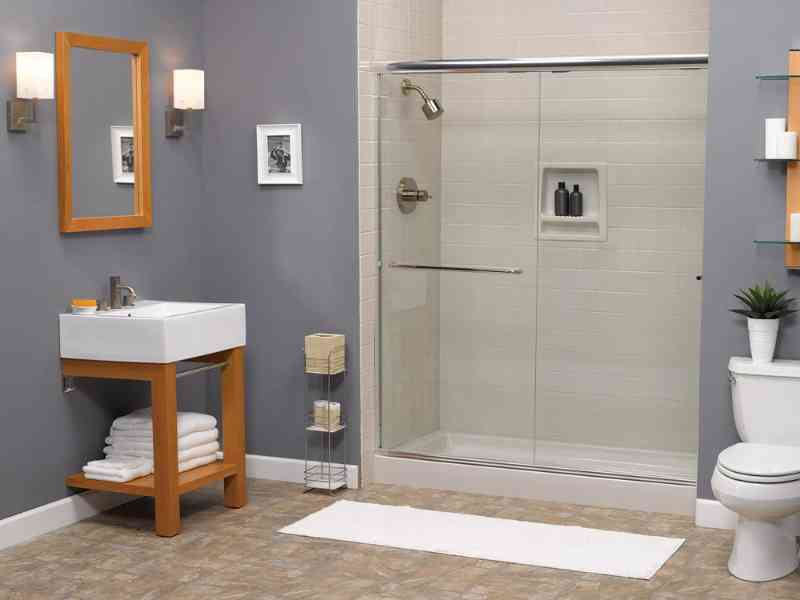
Step 2: Installing the new shower or tub
Installing the new shower or tub is a crucial step in a DIY bathroom remodel project. The following 5-step guide will walk you through the process: 1. Prepare the space: Clear out any debris and ensure the area is clean and ready for installation. 2. Measure and plan: Take accurate measurements of the space to determine the size and dimensions of the new shower or tub. This will help you select the right product for your bathroom. 3. Remove old fixtures: Disconnect and remove any existing fixtures, including the old shower or tub, plumbing connections, and surrounding tiles or walls. 4. Install new shower or tub: Follow the manufacturer’s instructions to properly install the new fixture in its designated location. Make sure all plumbing connections are secure and leak-proof. 5. Test and finish: Before completing the installation, test the water flow and drainage to ensure everything is functioning correctly. Then, finish off with any necessary caulking, sealing, or trim work to give a polished look. When installing a new shower or tub, it’s important to consider factors such as proper sizing, plumbing requirements, and functionality within your bathroom space. Keep these tips in mind throughout the process to ensure a successful installation: – Take accurate measurements multiple times to avoid costly mistakes. – Seek professional assistance if you encounter complex plumbing issues. – Choose durable materials for long-lasting performance. – Allow sufficient time for drying between steps to prevent damage. By following these guidelines, you can confidently complete step 2 of your DIY bathroom remodel project and create an upgraded shower or tub area that meets both your vision and functional needs. Get ready to walk on luxury with a new bathroom floor that screams ‘I’m too pretty to pee on!‘
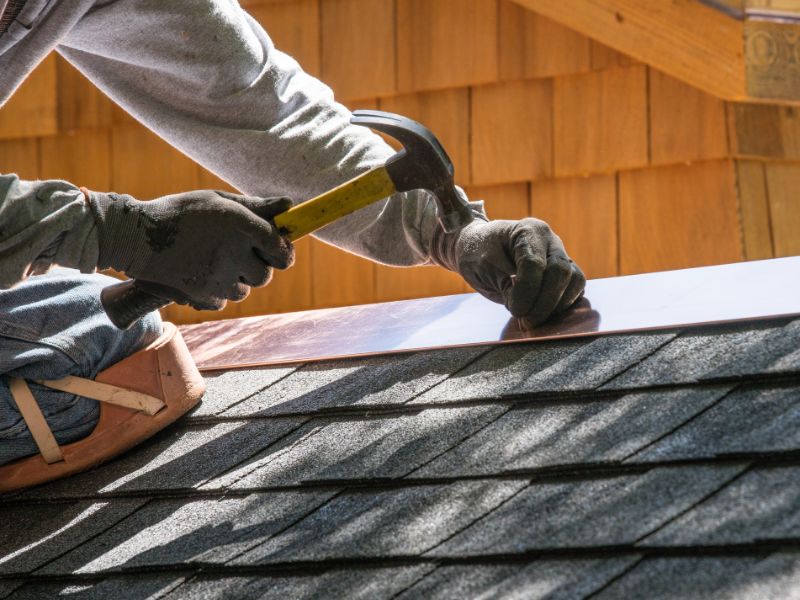
Step 3: Laying the new flooring
Laying the new flooring is a crucial step in a DIY bathroom remodel. It involves selecting appropriate materials and installing them properly to create a durable and visually appealing floor for your bathroom. Here is a 6-step guide to help you navigate through the process of laying the new flooring in your bathroom: 1. Remove the old flooring: Start by removing any existing flooring, such as tiles or linoleum, using appropriate tools. Ensure that the subfloor is clean and free from any debris or damage. 2. Prepare the subfloor: Inspect the subfloor for any uneven areas or structural issues. Make necessary repairs and ensure that it is level before proceeding. Apply an appropriate primer or underlayment if required. 3. Choose the right flooring material: Select a flooring material that suits your preferences, budget, and bathroom conditions. Common options include ceramic tiles, vinyl planks, laminate, or natural stone. Consider factors like water resistance, durability, ease of installation, and maintenance requirements. 4. Measure and cut the flooring: Take accurate measurements of your bathroom floor to determine the amount of flooring material needed. Use appropriate tools like a tile cutter or circular saw to cut the material into desired sizes or shapes. 5. Install the flooring: Start laying the flooring material from one corner of the room and work your way towards the exit. Follow manufacturer instructions for adhesive application or interlocking mechanisms if using modular materials like vinyl planks or laminate. 6. Finishing touches: Once all pieces are installed, carefully trim any excess material along edges or corners using trim pieces or molding strips. Clean up any adhesive residue or grout lines for a neat finish. Laying new flooring can be challenging but rewarding when done correctly and carefully. Take your time during each step to ensure proper installation and avoid future issues. With these tips in mind, you can confidently tackle Step 3: Laying the new flooring in your DIY bathroom remodel. Happy renovating! Hanging new bathroom fixtures: because who doesn’t want to feel like a professional plumber, even if it’s just for a day?
Step 4: Hanging new bathroom fixtures
In a DIY bathroom remodel project, Step 4 involves installing the new bathroom fixtures. This crucial step adds the finishing touches to your newly renovated bathroom, bringing functionality and aesthetics together.
Here’s a 3-step guide to successfully complete Step 4 of your DIY bathroom remodel:
- Prepare the area: Before hanging new bathroom fixtures, ensure that the walls are clean and dry. Remove any remaining debris from previous renovation steps. Use a level to mark the desired placement of each fixture.
- Install the fixtures: Begin by attaching any necessary mounting brackets or hardware to the walls. Carefully hang each fixture in its designated place, making sure they are securely attached. Follow manufacturer instructions for specific installation requirements.
- Test and adjust: After all fixtures are hung, test them to ensure proper functionality and stability. Check for leaks or loose fittings and make any necessary adjustments. Double-check that all fixtures are level and aligned with each other for a visually pleasing result.
When hanging new bathroom fixtures during your DIY remodel, keep in mind that attention to detail is key. Take your time and follow instructions accurately to achieve professional-looking results.
Unique details not previously covered include checking the weight-bearing capacity of your walls before installing heavier fixtures such as large mirrors or wall-mounted cabinets.
Don’t miss out on transforming your bathroom into a beautiful space that reflects your personal style. Take on your own DIY bathroom remodel project today by following these steps for hanging new bathroom fixtures. Your dream bathroom awaits!
Give your bathroom walls a fresh coat of paint and watch as your sanity chips away with every stroke.
Step 5: Painting the walls
The process of painting the walls in a DIY bathroom remodel involves several important steps to ensure a successful and professional-looking finish.
1. Preparation: Clean the walls thoroughly to remove any dirt, dust, or grease. Repair any cracks or holes with spackle and sand down rough areas for a smooth surface.
2. Choose the right paint: Select a high-quality paint that is specifically designed for use in bathrooms, as it will have better moisture resistance. Consider the color scheme and desired finish before making a final decision.
3. Prime the walls: Applying a coat of primer before painting will help the paint adhere better and provide an even base for the color. Use a roller or brush to apply the primer on the walls in even strokes.
4. Paint application: Start by cutting in around edges, corners, and fixtures with a brush. Then, use a roller to apply paint to larger areas, working from top to bottom in overlapping strokes. Ensure even coverage and avoid leaving visible brush strokes or roller marks.
5. Allow drying time: After applying the first coat of paint, wait for it to dry completely before applying additional coats if needed. Follow the manufacturer’s instructions for drying times between coats.
It is important to note that proper ventilation should be maintained during and after painting to help dissipate fumes and speed up drying time.
To achieve professional-looking results when painting your bathroom walls:
- Use high-quality tools such as brushes and rollers to ensure smooth application.
- Consider using painter’s tape along edges and fixtures to achieve clean lines.
- Apply thin coats of paint rather than thick layers, allowing each coat enough time to dry fully.
- If using multiple colors or designs, plan out your layout beforehand.
- Take your time and be patient throughout the process to ensure precision and attention to detail.
By following these steps and suggestions during Step 5 of your bathroom remodel project – painting the walls – you can achieve a beautiful finish that adds a fresh and updated look to your space.
Shed some light on your bathroom remodel with the illuminating step of installing new lighting fixtures.
Step 6: Installing new lighting fixtures
Installing new lighting fixtures is a crucial step in a DIY bathroom remodel. It involves selecting and placing the appropriate lighting to enhance the overall aesthetics and functionality of the space.
- Assess the existing lighting: Evaluate the current lighting situation in your bathroom, including natural light sources and existing fixtures. Determine if additional lighting is needed based on your preferences and requirements.
- Choose suitable fixtures: Consider the style, size, and functionality of the lighting fixtures you want to install. Opt for energy-efficient options that provide adequate illumination while complementing your bathroom’s design scheme.
- Determine placement: Plan the placement of your new lighting fixtures strategically. Identify areas that need task lighting, such as around the vanity or shower, as well as ambient lighting for overall illumination. Ensure appropriate spacing between fixtures for optimal functionality.
- Install with care: Follow safety guidelines while installing your new lighting fixtures. Turn off the power supply before working on electrical connections and always use proper tools and techniques. Seek professional help if you are unsure about any electrical work.
To add a unique touch to your bathroom, consider incorporating dimmer switches or smart lighting options controlled by voice or motion sensors for convenience and energy savings. When it comes to designing a bathroom that meets both aesthetic and functional needs, step 6 of a DIY bathroom remodel, which involves installing new lighting fixtures, plays a crucial role. Properly assessing the existing lighting situation, choosing suitable fixtures, determining their placement strategically, and ensuring careful installation will help create an inviting ambiance in your revamped space. Don’t miss out on this essential step to transform your bathroom into a well-lit retreat that reflects your style and enhances daily routines! Take charge of your DIY bathroom renovation project today and enjoy the benefits of a well-designed space tailored to suit your needs. Step 7: Adding finishing touches and decorations – because a bathroom makeover isn’t complete without a touch of your unique style.
Step 7: Adding finishing touches and decorations
Step 7: Enhancing the Final Look with Decorative Accents and Touches
Adding the finishing touches and decorations is an important step in completing a DIY bathroom remodel. It involves incorporating decorative accents and elements that enhance the overall look and feel of the renovated space. These final details can greatly contribute to creating a cohesive and visually appealing bathroom.
Here is a 4-step guide for adding the finishing touches and decorations to your remodeled bathroom:
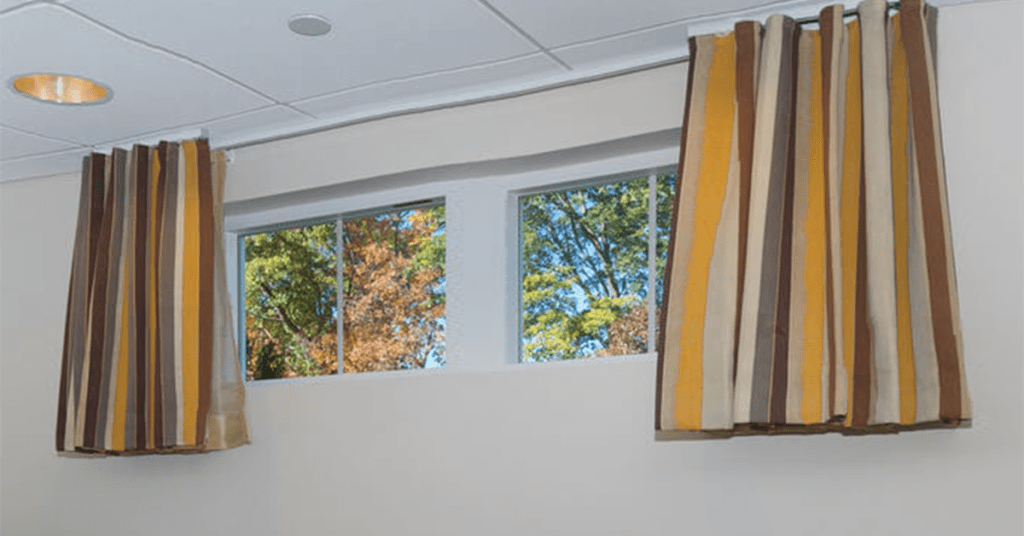
- Choose appropriate accessories: Select accessories such as towels, rugs, shower curtains, and window treatments that complement the color scheme and design of your bathroom. Consider using textures, patterns, or colors that add depth and visual interest to the space.
- Install functional yet stylish fixtures: Opt for fixtures like towel bars, soap dispensers, toilet paper holders, and robe hooks that not only serve their purpose but also contribute to the overall aesthetic of your bathroom. You can choose from a range of styles to match your personal taste and design theme.
- Display artwork or decor pieces: Hang wall art or display decor items like plants or sculptures on floating shelves to add personality to your bathroom. Choose pieces that reflect your style while complementing the color palette and ambiance you want to create.
- Pay attention to lighting details: Use lighting fixtures strategically to create different moods within your bathroom. Task lighting near mirrors for grooming purposes, ambient lighting for relaxation during baths, or accent lighting to highlight specific design features can all elevate the overall atmosphere of your renovated space.
Incorporating these steps into your DIY bathroom remodel will help you achieve a polished end result that showcases your personal style while maintaining functionality.
Finish your DIY bathroom remodel with a bang and prove once and for all that you don’t need a plumber or therapist when things go down the drain.
Conclusion
In conclusion, let’s recap the key steps involved in a DIY bathroom remodel and feel empowered to take on your own renovation project. Throughout this article, we have discussed various tips and insights to guide you through the process. From proper planning and assessing your budget to selecting the right materials and fixtures, each step plays a vital role in achieving a successful remodel. With the knowledge and resources at your disposal, I encourage you to embark on this exciting journey of transforming your bathroom into a space that reflects your style and meets your needs. Remember, you have the capability to create a beautiful and functional bathroom of your dreams.
Recap of the steps involved in a DIY bathroom remodel
A Brief Guide to the Process of DIY Bathroom Remodeling
The process of remodeling a bathroom can be both rewarding and cost-saving when done as a DIY project. By following a few key steps, you can successfully transform your bathroom into a space that reflects your vision and skill set.
Step 1: Removing bathroom fixtures
Begin by gutting the existing bathroom, removing old fixtures such as the sink, toilet, and bathtub or shower. This creates a blank canvas for your renovation project.
Step 2: Installing the new shower or tub
Next, focus on installing the new shower or tub. Ensure that all plumbing connections are properly secured and that any required waterproofing measures are taken before proceeding.
Step 3: Laying the new flooring
With the major fixtures in place, it’s time to lay the new flooring. Choose a material that is suitable for wet environments, such as ceramic tile or vinyl, and ensure it is installed correctly to prevent water damage.
Overall, embarking on a DIY bathroom remodel requires careful planning, attention to detail, and basic DIY skills. By following these steps and considering important factors such as color scheme, fixtures, storage spaces, and utilities placement, you can achieve an impressive transformation within your budget.
True Story:
Sarah had always dreamed of renovating her outdated bathroom but was hesitant due to budget constraints. Determined to make her vision come to life without breaking the bank, she decided to tackle the project herself. With research, careful planning, and a little guidance from online resources, Sarah successfully completed her DIY bathroom remodel. The process was challenging at times but ultimately rewarding. Now she enjoys her newly renovated bathroom every day with pride in her accomplishment.
Encouragement to take on your own bathroom renovation project
“Taking on your own bathroom renovation project can be an empowering and rewarding experience. Not only does it give you the opportunity to customize your bathroom according to your preferences, but it also allows you to save costs by adopting a DIY approach. By taking charge of the remodeling process, you can bring your vision to life and create a space that reflects your personal style and taste.
Here is a 4-step guide to encourage you in taking on your own bathroom renovation project:
- Planning: Start by thoroughly planning out your renovation project. Consider factors such as the design that fits your vision and DIY skill set, color scheme considerations, fixtures you want to replace, storage spaces required, and marking the location of utilities.
- Gathering tools and supplies: Before diving into the renovation process, make sure you have all the necessary tools and supplies. Essential tools include a hammer, screwdrivers, pliers, measuring tape, level, tile cutter, and paintbrushes. Optional tools like power drills or saws may also come in handy for certain tasks. If you don’t have all the tools required, consider renting or borrowing them to save costs.
- Step-by-step process: Follow these steps for effective bathroom remodeling:
- Remove bathroom fixtures: Begin by removing old fixtures carefully.
- Install new shower or tub: Install the new shower or tub according to manufacturer instructions.
- Lay new flooring: Replace the old flooring with new tiles or other preferred material.
- Hang new bathroom fixtures: Mount new fixtures such as toilets, sinks, and cabinets securely.
- Paint walls: Give your bathroom a fresh look by painting the walls with colors of your choice.
- Install new lighting fixtures: Upgrade the lighting in your bathroom for better functionality and ambiance.
- Add finishing touches: Complete the renovation by adding decorative elements like mirrors, artwork, towels, etc.
- Suggestions for success:
- – Research and plan extensively before starting the project to avoid any surprises or setbacks.
- – Take safety precautions, such as wearing gloves and goggles, when working with tools or chemicals.
- – Seek advice or assistance from professionals if you encounter complex tasks beyond your skill level.
- – Stay organized and keep track of progress to ensure a smooth renovation process.
By following these steps and suggestions, you can confidently embark on your own bathroom renovation project. With careful planning, proper tools, and a bit of creativity, you can transform your bathroom into a space that reflects your individual style and meets your unique needs. So go ahead and take the leap – you’ll be rewarded with a beautiful bathroom that you can proudly call your own.”
Five Facts About DIY Bathroom Remodel Helpful Tips:
- ✅ Remodeling your bathroom yourself can save you thousands of dollars. (Source: Team Research)
- ✅ Limiting the use of expensive materials like tile can help keep costs low in a bathroom renovation. (Source: Team Research)
- ✅ Refinishing fixtures instead of buying new ones is a cost-saving tip for a bathroom remodel. (Source: Team Research)
- ✅ Before starting a bathroom renovation, it’s important to decide on design elements including color scheme, new fixtures, storage spaces, and the location of utilities. (Source: Team Research)
- ✅ Essential tools for a bathroom remodel include a safety mask, gloves, tape measure, power drill, and a utility knife. (Source: Team Research)
FAQs about Diy Bathroom Remodel Helpful Tips
Question 1: How can I remodel my bathroom while keeping costs low?
Answer 1: To keep costs low during a bathroom remodel, consider taking the do-it-yourself route. This can save you as much as a few thousand dollars. Additionally, limit the use of expensive materials like tile and consider refinishing fixtures instead of buying new. You can Also let us handle everything for you.
Question 2: What design elements should I decide on before remodeling my bathroom?
Answer 2: Before starting your bathroom renovation, decide on important design elements such as the color scheme, new fixtures, storage spaces, and the location of utilities. This will help you plan and ensure that your vision is realized without any clashes in style.
Question 3: What are the essential tools and supplies that I need for a DIY bathroom remodel?
Answer 3: Essential tools and supplies for a DIY bathroom remodel include a safety mask, gloves, goggles, caulking gun, silicone sealant, hammer, tape measure, spackle knife, spackle, stud finder, power drill, pry bar, bucket, chisel, adjustable wrench, flathead screwdriver, hacksaw, utility knife, chalk line, and an extension cord. These tools are crucial for a successful remodel.
Question 4: Are there any optional tools that you recommend for a bathroom remodel?
Answer 4: Yes, there are optional tools that can make your bathroom remodel easier. We recommend having a wet-dry shop-vac on hand in case of any water spills during the removal of fixtures. A cordless drill is also useful in providing flexibility and freeing up your extension cord for other power tools. These optional tools can be rented at home improvement stores or borrowed from a handy friend or family member.
Question 5: How do I properly remove bathroom fixtures during the renovation process?
Answer 5: When removing bathroom fixtures, it is important to start by shutting off the water and draining and removing the toilet to avoid any spills. If you’re removing a bathtub, cover it up and proceed to remove the bath tile down to the studs for plumbing modifications. Remove insulation where necessary using a reciprocating saw, and then remove the vanity, cabinets, mirror, flooring, and any other features you plan to replace.
Question 6: What should I consider when choosing a new shower or tub for my bathroom remodel?
Answer 6: When selecting a new shower or tub for your bathroom remodel, consider factors such as the design of your bathroom, available space, and the resale value of your home. Pick a pan or basin shape that fits your desired style and the location of the door. If possible, it is recommended to keep at least one tub in the house for resale value, although walk-in showers are becoming more popular.